Friday, June 29, 2012

Nutra Nail Gel Perfect

So I had been hearing about this new nail polish/at home shellac style UV-less nail polish by Nutra Nail called Gel Perfect. I happened to be in my local Fred Myers (that's a Kroger brand store in the North West in case you don't have them) and found that not only did they have them but that they were on clearance and all clearance was and additional 50% off. Needless to say I picked up one to see if I liked it. I ended up paying $4 for a product that is usually 3 times that much. Plus I get to try a new nail polish type. Which I love and the promise on the box "Sets rock Solid in 5 minutes" sounded pretty nice to me. I do some pretty elaborate designs some days but others I really just want a pretty color to protect my nails (because they break so easily if they are not polished). Any way I picked up number 12767 Blueberry, which is a really pretty neon-ish blue color. Which was perfect because blue is my favorite color.

Before we get to far into it here is what the product looks like. 

So I get the product home and open it. Inside there are three bottles. 1 Gel Perfect Nail Color, 1 5 Minute Gel Polish Activator, and 1 Nail Cleaner.
Here are the three bottles inside. Your brush cleaner will be clear when new but I took this picture after I used it so mine is kind of blueish. 

There is also a set of instructions which I can't stress enough that you need to read before applying the product. Start with clean dry nails. Shape them as usual and lightly buff the surface (just to remove the shine). Apply a liberal coat of  5 Minute Gel Polish to one hand, then immediately apply the Gel Perfect Nail color. First coat will be streaky so repeat the process. I used two coats. Then repeat the pattern for your other hand. The first time you use this product the finish is not going to be as great as it could be. Here is what I figured out worked to get the best finish. The box instructions say to switch the brushes in the brush cleaner and Gel Perfect Nail Color bottle after a coat for each hand. For me that was not enough to keep the finish smooth. I switched brushes after every third nail. This keeps the activator from gunking up the brush and you get a smoother finish. Like any new nail technique this requires patients and practice. If you are switching the brushes as often as I do you should get a fairly smooth finish.

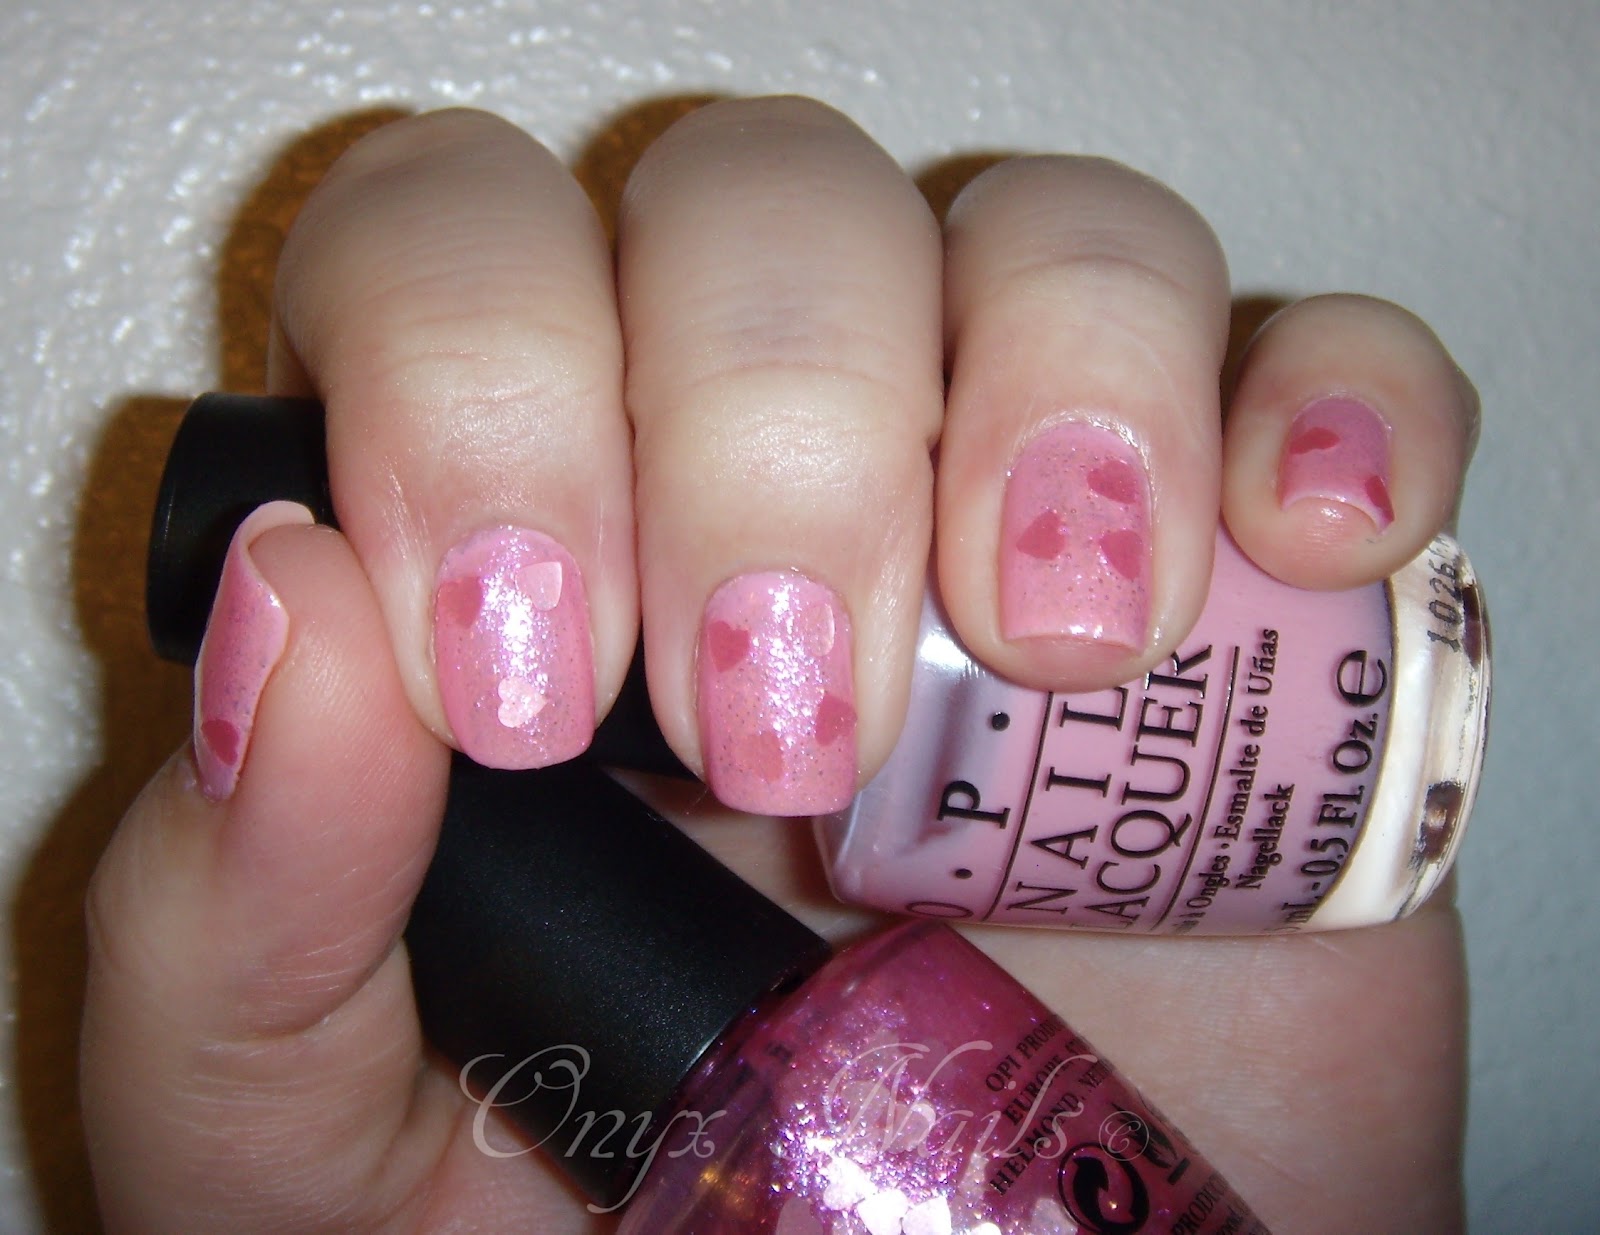
Here's what my nails looked like once they were painted.

Now to the fun part, the product review. The box claims the product dries in 5 minutes, creates a patent leather shine (no top coat necessary), protects nails from breaking, and is easy to remove. Okay I am going to address these one at a time and you'll see why I am in love this product. First the 5 minute dry time...yeah mine dried to rock solid in less than 5 minutes I was able to type, and sort papers within 4 minutes because my nails were fully dry. How awesome is that? Second the patent leather shine. It fully lives up to this claim. I love patent leather shine, it's one of my favorite things about nail polish, the high shine finish on my nails makes me happy. But usually I have to use a good top coat to get it, but not with this product. You get the shine of a quality top coat without the additional step. Third it states that it protects your nails from breakage. I was skeptical on this one but who better to test this out than me, as I am quite possibly one of the most unlucky, clumsy people in the world. As if on Que I somehow managed to get my right hand caught in my bathroom door. Don't ask how my clumsy butt did this...let's just say it involved a cardigan tie and a boor knob getting tangled.....you don't want to know, just be happy it was me and not you and have a good laugh at my expense. I was sure by the pain that was shooting up my pinkie, ring and middle finger on my right hand made me sure I had just had a major nail catastrophe on my hands. I looked down I noticed that no only had my nails not been broken off but only that my nail polish on those nails had cracked, they took the force of the blow and spared the nails. No seriously, even after I removed the polish my nails had only a few white marks from the impact, the polish had spared my nails. Yay! Okay, yeah I know I am getting a little over excited about this but anything that saves my nails makes me a happy girl. Then lastly I want to address the ease of removal. The box recommends that you use Nutra Nail's No Mess Express Gel Perfect Remover. As I could not find this at Fred Myers I bought Onyx Professional 100% Acetone nail polish remover instead (they had a couple brands but I couldn't resist the name as Onyx is my favorite gemstone and the name of my blog it seemed like fate).  I soaked a cotton pad in the acetone nail polish remover and held it to my nails for approximately a minute. The polish came right off and didn't even stain the nail bed (which is weird for blue polish as it's particularly troublesome in that department). I also want to bring up something that the box didn't say, which is the length of wear time for this polish. I kept it on for five days. I took five showers, I washed my hair five times, made dinner five times, cleaned my apartment (including dusting which usually kills my manicure), and one hand shut in a door (not my finest hour).

And here is what they looked like right before I took the polish off on the night of Day 5.
I don't know if you can see it but there are small cracks on my pinkie, ring, and middle finger as well as a small chip on my ring finger and one on my thumb.

Five days of wear is more than I have every asked from a polish. That alone amazed me, but the fact that it had saved my nails from certain breakage via door, made me love this product. Honestly after five days I am itching to change my color anyway so this polish more than suited my needs and hopes for this product.

There are a few other things I think are worth noting about this product. Once it's dry is has a beachy kind of smell to it...for some reason in reminds me of sunblock and then I think of summer which I actually kind of like. I don't know if that's supposed to be the case or if I just got a fluke bottle but I kind of like that my nails smell like summer when I have this polish on. And one last thing about this product. If you use 100% acetone to remove your polish make sure you moisturize your nails afterward, because acetone strips the moisture out of your nails and skin. Dry skin and nails means breakage, peeling, hang nails, and possible infections. I soaked my nails in olive oil for 10 minutes (per hand) after taking off this polish to help restore the moisture. Other than that I highly encourage anyone to buy and try this product. Have you ladies tried this product yet? If you have leave me a comment about your experience with it. And as always stay classy and stay polished. XOXO

Monday, June 25, 2012

Side By Side Comparison

So in my Tropical Summer Sun Manicure Tutorial I mentioned that I was trying a new nail polish routine that I had seen on YouTube. Yeah, so I am so much less than pleased with the results. In fact I am going to say that using Instant Artificials as a base coat is the worst idea in the long sad history of bad nail ideas. Alone as a 'I don't want to do my nails today' protective clear coat it's great, as a base coat is sucks hard core. I decided the best way to show you was by comparing it to the wear and tear of my normal nail polishing routine.

The experiment manicure. Here's how my nails started out.

I used this as my base coat
Salon Sciences Instant Artificials

Here's what it looked like after 12 hours. I had not showered in the 12 hours only washed my hands a few dozen times. I actually decided to take this picture right before I got in the shower and this is what I got.

And here's what it looked like after I showered and blow dried my hair exactly 13 hours after I polished them.
 My left hand had two full nails of polish peeled off and chips on two other nails.

My right hand (I'm right handed) had two and 3/4 full nails worth of polish peeled off and the remaining two nails where both chipped.

13 hours is not an acceptable length of time for a manicure to last. Seriously this was supposed to be the 'miracle' that lasts for weeks manicure solution???? I had more polish missing than polish that remained on my nails. This is what I get for trusting the word of someone with nails so short they are barely past the quick. The tricks that work for barely there nails, don't work for those of us with longer nails. It's easy to not chip nail polish when the free edge is still attached to the quick. I will be sticking with my usual routine and you will see why in just a second I documented my normal wear and tear so that you can see a comparison for yourself.

Here's how my nails started.
I have China Glaze Mummy May I, from the 2010 Halloween collection on my nails if you are wondering.

After 24 hours (1 day) and a full long hot shower.
Minor chippage on one nail and an easily fixed one at that. 

And after 48 hours (2 days) and two full length long showers. A friend of mine and I judge the length a manicure lasts by how many shampoos it survived. For this picture it survived two shampoos. That's pretty impressive.
 This wear and tear could also be from everything else I did while it was on my nails. I did laundry, cleaned my apartment, and cooked dinner both nights (Which as any of you ladies who cook know, cooking has a way of trashing even the best of manicures...specially onions for some reason). I don't go easy on my nails. I don't sit around and do nothing. In fact I don't know that I have ever sat around and done nothing. Even when I talk I use my hands. My hands have to do a lot of work, I want a base and top coat that can take some abuse. Instant Artificials as a base coat didn't come anywhere near filling my needs. I will be sticking with my usual routine. After all this nail/hand usage I only ended up with small chips easily fixed if you know how to work that nail polish wand, with my usual routine. So you are probably wondering what I used as my normal routine. 
Here's a pic. 
My normal base coat and top coat

I'm going to stop at 2 days because in my opinion it's already outlasted the "miracle" YouTube technique that a vloger posted. Granted my way isn't perfect but after 2 showers, shampoos, cleaning my apartment, and cooking, my nails still retain almost entirely polished. And after using Instant Artificials  it failed in a spectacular fashion after a half a day.

Has anyone else tried this method? Did it work for you? What are your thoughts? Comment below. And as always stay classy and stay polished.

Friday, June 22, 2012

Tropical Summer Sun Manicure Tutorial

I had a pretty rough week this week and decided that I would try a new original design manicure. Since painting my nails calms my mind. I wanted something fun and summery to cheer me up. Plus I am really loving sponging nail art at the moment so I decided that it had to be a part of today's manicure. So let's get started shall we? Here's what we are going to need for this manicure
Metallic orange polish (China Glaze Cross Iron 360), a yellow shimmery polish (China Glaze Solar power), ten small (1mm or smaller) gemstones, a base coat, a top coat, a dotting tool, tweezers a small piece of sponge and lastly something you don't mind dripping polish on. I also want to mention that I am trying a tip I heard about through YouTube tutorial (by StellarDistraction) about how to make your manicure last by using Instant Artificials as a base coat. I figured I already had this product and would see if it really lengthened the wear time of a manicure. I'll report back later on that though. I'm digressing again back to the manicure. 

White Konad polish, a stamper, a scraper and Shany Plate number SH11.

It might be useful to have one of these as well. This is a gem stone picker. The little clear plastic ends make it really easy to pick up the gem stones.

Start with a clean dry nail.

Apply a base coat, don't forget the free edge.

Apply the yellow polish to the whole nail. Use as many coats as you need for the color to be opaque. I used two coats.

Put a dab of the metallic orange polish on the lid (or whatever surface you don't mind gunking up with polish).

Dab sponge in orange polish gently

Sponge polish onto the nails in a diagonal from the top of the nail. Then clean up any polish that got on your skin. Apply a top coat and allow to dry. You want a top coat here so that if we mess up stamping it's easier to clean up, stamp, and try again without having to remove all polish and start from square one.

Stamp the pattern diagonally across all nails. Let dry. Sorry I didn't take more pictures of this process but You have to work so fast when stamping that taking pictures becomes burdensome. 

Drop some top coat on the plastic surface and select 10 gem stones.

Use your dotting tool to place a dot of clear polish in the center of the flower you just stamped on your nail. 

Then pick up the stone like this. Or...

Like this. I use to use the above method until I found this beauty in Sally Beauty Supply. It picks up the stone every time, no need to have clear polish on the dotting tool to pick up the stone. It also makes it easier to place the stone and seat them firmly on your nails. For me it also seems more precise, you know exactly where that little stone is going. But use whatever you have.

Place the stones on the dot of top coat that you placed at the center of the flower you stamped earlier. Place all stones and let dry.

Apply a heavy top coat. You want to secure those stones. Don't forget the free edge. Also It's helpful if you let your nails dry a few hours then apply another top coat to seal the stones to the nail to reduce the risk of them popping off.

And here's the finished product. A fun summery look that to me screams beach...except I live in Idaho and the closets thing we have to a beach is a sand dune. Translation all the sand in you crevices and none on the waves. But if you are geographically blessed this could make a great beach manicure for you. Any way I hope you enjoy this manicure and want to try it yourself. If anyone has any requests for tutorials you would like to see in the future leave me a message below and I'll see what I can do. As always stay classy and stay polished.


Friday, June 15, 2012

Galaxy Nail Tutorial

So I wanted to do this manicure earlier in the week (Because I went to go see Prometheus and wanted a mani that fit).Which was awesome by the way, but I'm getting off topic. I wanted something cosmic because duh, the movie is about space travel and aliens and stuff. But lucky me I got a virus or something and was sick most of the week. So I decided I was going to do the nails and this tutorial anyway. Also on a side note you should go see Prometheus...Michael Fassbender is yummy. And I am fully convinced that someone needs to get on making some Michael Fassbender androids because I want one. I know, I need to focus, the nails that's what we are here for right? Any how, Here's what you are going to need for this manicure. It seems like a lot but it's actually a pretty fast manicure. Longest part is dry time.

Any black nail polish, base coat, top coat, Q-Tips, tweezers, some tiny sponge pieces and something to put the polish on. And because I like to reuse things whenever I can I am using the lid of an empty Crystal Light container for this purpose. 

 Then a selection of polishes that seems space-like. I like blues so I went with blues, greens and yellows, but I have also seen it done with purples and pinks. Just pick a color scheme you prefer. Oh, and sorry the picture is a little yellow my camera was having an episode.

And lastly a nail polish with large hexagonal glitter in it (I chose China Glaze Techno), and a dotting tool. I used my smallest dotting tool, you will see why you'll need this later. 

Start by applying a base coat to clean dry nails

Then paint them black. Use as many coats of polish as you need to make it opaque. I used 2. Then let them fully dry.

Now you will need the plastic surface to drop your polish on. I know a lot of people use paper for this and that's fine but my re-purposing side has a seizure at the thought of how much waist that is. I use plastic lids because when you are done you just let them dry and you can easily pick off the nail polish blobs. And once they are removed from the plastic you have a clean surface that you can use the next time you do nail art that requires it. It's like uber re-purposing. You can reuse the lid until it cracks then you can recycle it. Think of how many pieces of paper you'll be keeping out of a land fill.

It's important to mention here that you want your sponge pieces to be small and jagged (the more jagged the better). They make for a more random natural polish transfer. Nature doesn't make straight lines so neither should you. Next you will grab one of the little sponge pieces in your tweezers.

Then dip it into the polish gently. And sponge it onto your nails. There is no right or wrong patterns here. Just start by gently tapping it on the nail in whatever pattern strikes your fancy. You don't want this one opaque though, you want it see through. It's also important to note that you will want a different sponge for each polish (so you don't blend the colors unintentionally).
  
Just free hand a pattern but don't cover the entire surface just a good portion of it. I chose my lightest shade (China Glaze Sea Spray) for the first color because it's creamier and made a good base for the other polishes to build on top of. 

Repeat the previous steps with the next color. I used China Glaze Blue Iguana. You will only want to apply this color to the center of the section you already sponged the light blue on to. 

Then sponge the next color. I chose green (China Glaze Cha Cha Cha). Place however you want (if it's a thin color like mine is). Stick to the centers if it's a creamier color. Go easy on this level.

Then again with the yellow polish (China Glaze Solar Power). Go easy on this one as well. You only want a tiny bit of the yellow and try and keep it to the center.

Then you will take the dark blue and this one is crucial you need a dark creme blue polish. I used China Glaze Bermuda Breakaway. You will take this on the sponge and dab it around the borders of the polish. You are using the dark blue to blend out any harsh edges and to make the tiny solar system you just created look like it's emerging from space (the black background). Then you clean up around the edges of the nail removing any polish that may have gotten on your skin. Then here comes the boring part...you wait. Wait till your nails are fully dry. I waited 15 minutes to make sure they were really good and dry. Remember this is a crucial step you have a lot of polish on your nails, it needs time to dry. 

 Once your nails are dry place a blob of your glitter polish with large hexagonal glitter in it on your plastic lid.

Use your dotting tool to isolate a hexagon to be placed on your nails at random. Place the hexagons (3-6 based on how big your nails are) per nail, and place them randomly. These are the tiny little planets in your nail solar systems. 

Once your hexagonal glitter/planets are placed your nails should look like this. 

Then comes the fun part where the galaxy starts to take shape. Take a micro-holographic nail polish (I used China Glaze Fairy Dust) and brush it over the whole nail. Then wait for it to dry again. About 15 minutes should do it.

Then add a top coat. Don't forget the free edge. This design is too cute to lose to early chipping.  


And your finished product. You have to see these nails in daylight to get the full effect. You're own sparkly solar system right on you finger nails. Thanks for joining me on this nail adventure and I hope you've enjoyed the tutorial and feel like you can go make your own solar system now. Until next time, stay classy and stay polished. 
XOXO


Wednesday, June 13, 2012

Nothin' Mousie 'Bout It by OPI


So I was really excited that a new polish came in the mail last Friday. I meant to post this review sooner but I've been feeling sick and am just now getting around to it. I know you're probably asking why I had to order the polish instead of going to a store an buying it....I blame Idaho. Whenever I get a new OPI I have to order it online because the collection colors are hard to come by in my town. Stupid Idaho...sorry I'm getting off track again. The new nail polish is called Nothin' Mousie 'Bout It by OPI from the Vintage Minnie Mouse collection. As soon as the tracking said it was delivered I ran out and pulled it out of my mailbox all excited to have this beautiful polish. And after I held the bottle in my hand,  and got lost in it's sparkly gorgeousness for a few minutes, I knew I had not made a mistake in ordering it. After I recovered from my Valkerie like trance induced by sparklies (If you've read Kresley Cole's Immortals After Dark Series you know what I'm talking about), I immediately took some pictures for my blog. This is truly a beautiful nail polish. It's a light pink jelly polish with micro flakie glitters and pale pink heart shaped glitters in it. It's meant to be worn over another polish as a hint of glimmer and a few tiny heart shaped glitters for accent.

Here's a picture of the bottle that arrived.

 And a closeup so you can see all the cute little hearts in it. 

I only bought the one polish from this line because normally I'm not a big fan of the color pink in general and this entire line is variations/shades of pink. It's a combination of being too frou-frou and the fact that I'm pale as a ghost and pinks just exacerbate that fact. Red I love, pink...yeah not so much. But the second I saw those tiny little heart glitters in the bottle, I knew I had to have this polish in my collection. I have so many ideas for Valentines Day next year it's crazy. And even though it's not the right time of year for tiny hearts I decide to try a few different manicures with this one right away. I'm using the excuse of my friend getting married last weekend as a good enough reason to sport hearts on my nails for a couple of manicures. 

Here's the first Manicure
Both polishes are OPI. Two coats of Pink-ing Of You and two coats of Nothin' Mousie 'Bout It

And here's the second Manicure
This one is a French Manicure with (my Fraken Polish) Onyx Polish I Lycan It on the tips and Nothin' Mousie 'Bout It over the whole nail. 

After having used this polish twice and removed it twice I have a love hate relationship with it. Now let me explain that to you a little bit better. I love the way it looks on, a little shimmer, a few tiny hearts, and surprisingly I even like the color. The only issues I had with this polish is that it's a really thick formula and like all thick formula's it takes a while to dry. There is also a trick to applying the polish to make sure you get the little hearts out of the bottle. Invert the bottle and roll between your hands as usual, then turn it right side up before unscrewing the lid, swirl the wand around in the polish, then drag the brush along the inside of the bottle as you pull it out to make sure you have isolated a tiny heart to apply to your nail. It's also worth mentioning that while you have to work to get those itty bitty hearts on your nails they can be a beast to get back off. I had to soak my nails in acetone polish to get it off both times. I guess you could also try the foil method to remove it but I am out of tin foil at the moment so I had to go old school.

I don't want it to sound like I don't like this polish. Because I do, I really do. I just think it's important for anyone buying this polish to know that it's a longer drying polish and can take some effort to apply properly. You know, just so you guys are aware of what you are getting into. My honest opinion on this polish is that it's amazing, and will make for some cute nail design next February but it also takes some practice and patients to use. You wouldn't want to use this polish if you are in a hurry and need a quick drying polish...you would just be looking for nail smudges. Any way those are my thoughts on OPI's Nothin' Mousie 'Bout It. You can take or leave them. As always stay classy and stay polished.